|
 |
auto
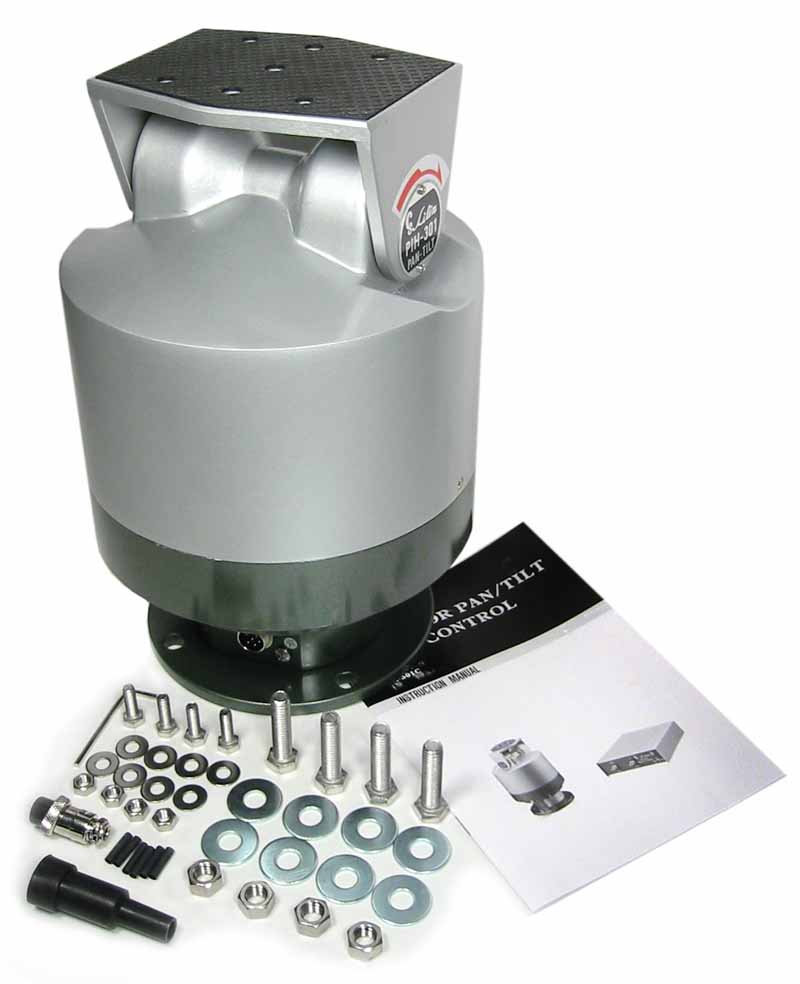
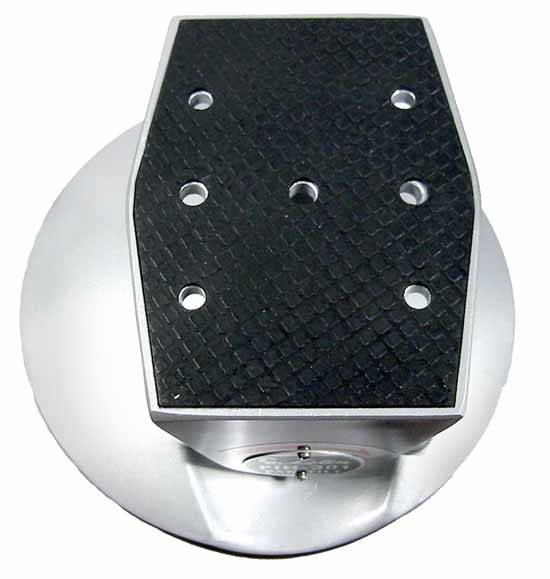
pan tilt head
with wired remote control
Allows
you to move the camera up & down, right & left
over a wired remote
control. |
|
|
Book mark us now, press Ctrl and D at the same time. 
Model
# PT1000n
Weather proof, indoor or outdoor, motorized pan & tilt system. |
 |
 |
 |
 |
 |
|
OutDoor Motorized
Pan and Tilt 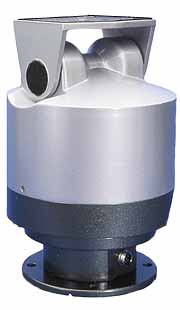 | |
|
| Pan and Tilt Motor | |
Pan
Tilt Control |
| | |
| Rotation
Angle | Pan 350
degrees | | Tilt
Angle | Tilt
up 60 degrees
Tilt down 60 degrees | | Pan
Speed | 6
degrees/sec. | | Tilt
Speed | 3
degrees/sec. | | Maximum
Load | Tilt
80 pounds | | Limit
Stop | Externally
adjustable | | Motor
power | 24
Volts at 6 Watts | | Duty
Cycle | Pan
Continuous
Tilt Intermittent | | Cable
Requirement | 6-connector,unshielded |
| Input
Voltage | AC
24Volts | | Construction | Aluminum
alloy | | Seals | Quad
ring and gasket seals for all-weather protection. | | Operating
Temp. | -3
F to + 140 F | | Operating
Humidity | 35%
to 90% Relative Humidity | | Dimension
H, D | 11"
High, 8" Dia. | | Weight | 17
Pounds | | | |
| | | | |
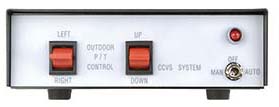
| Control
Buttons | Auto/Off/Manual,
Left/Right,
Up/Down | | Input
Voltage | AC
117V 60 Hz | | Output
Voltage | AC
24 Volts | | Power | Slide
switch,
Auto, Off, Manual | | Operating
Temperature | +14
F to +140 F | | Construction | Steel,
baked enamel finish | | Dimension
W,H,D | 6",
2.5", 8" deep | | Weight | 3
Pounds | | | |
| | | | | |
| | | | | |
|
|
| Allows you to move the camera
up & down, right & left over a wired remote control. |
| |
| Manual for the Motorized Pan Tilt |
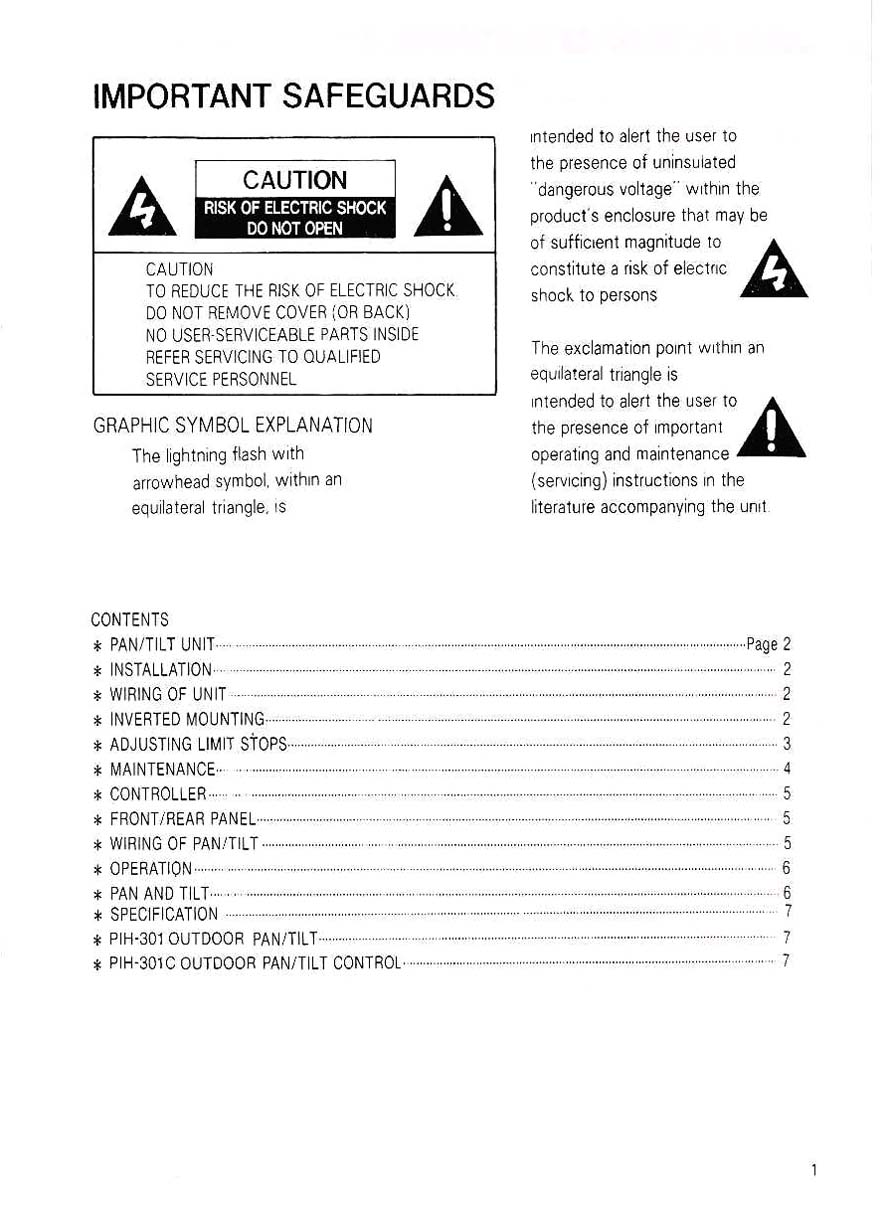
| SAFETY
PRECAUTIONS
CAUTION:
Risk of Electric shock. Do not open.
CAUTION:To reduce the risk of
electrical shock. Do not open covers.
No user serviceable parts inside. Refer
servicing to qualified service personnel.
GRAPHIC SYMBOLS EXPLANATION:
The lighting flash
with a arrowhead symbol, in an equilateral triangle, is intended to alert the
user. There is uninsulated"dangerous voltage" presence near the product's
enclosure which may be a risk to people.
The exclamation point
within an equilateral triangle is to alert the user to reference of the important
operating and maintenance (servicing) instructions.
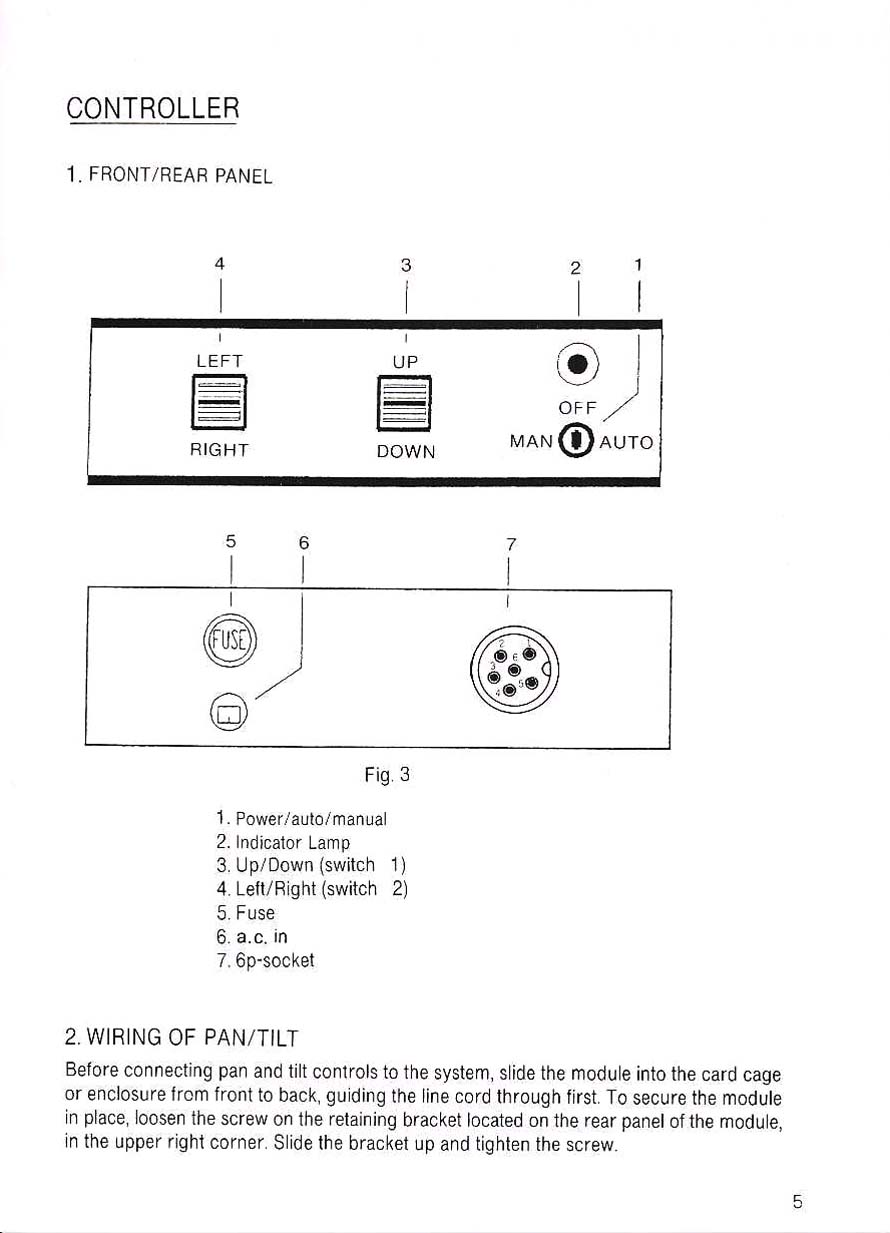
PAN/TILT UNIT
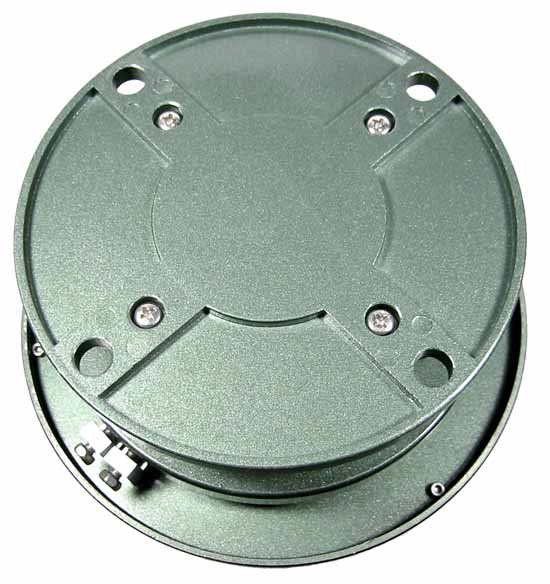
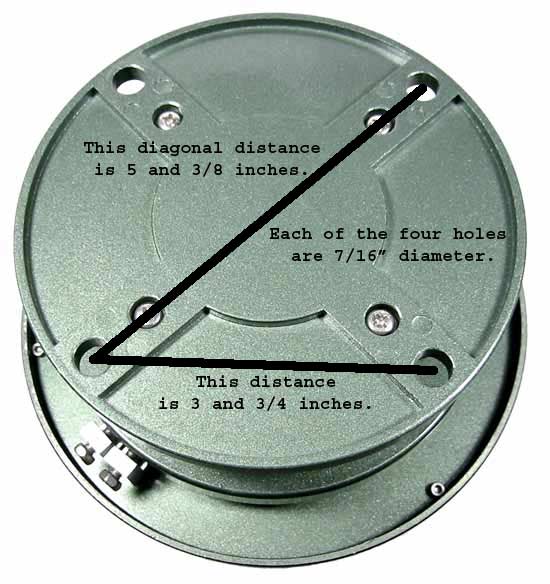
1. INSTALLATION
It is intended to
be mounted on a Wall Mount. Installation of the pan and tilt drive to the wall
mount requires a stainless steel ¼-20 screw supplied with the wall mount.
Securely mount the motor to the wall mount.
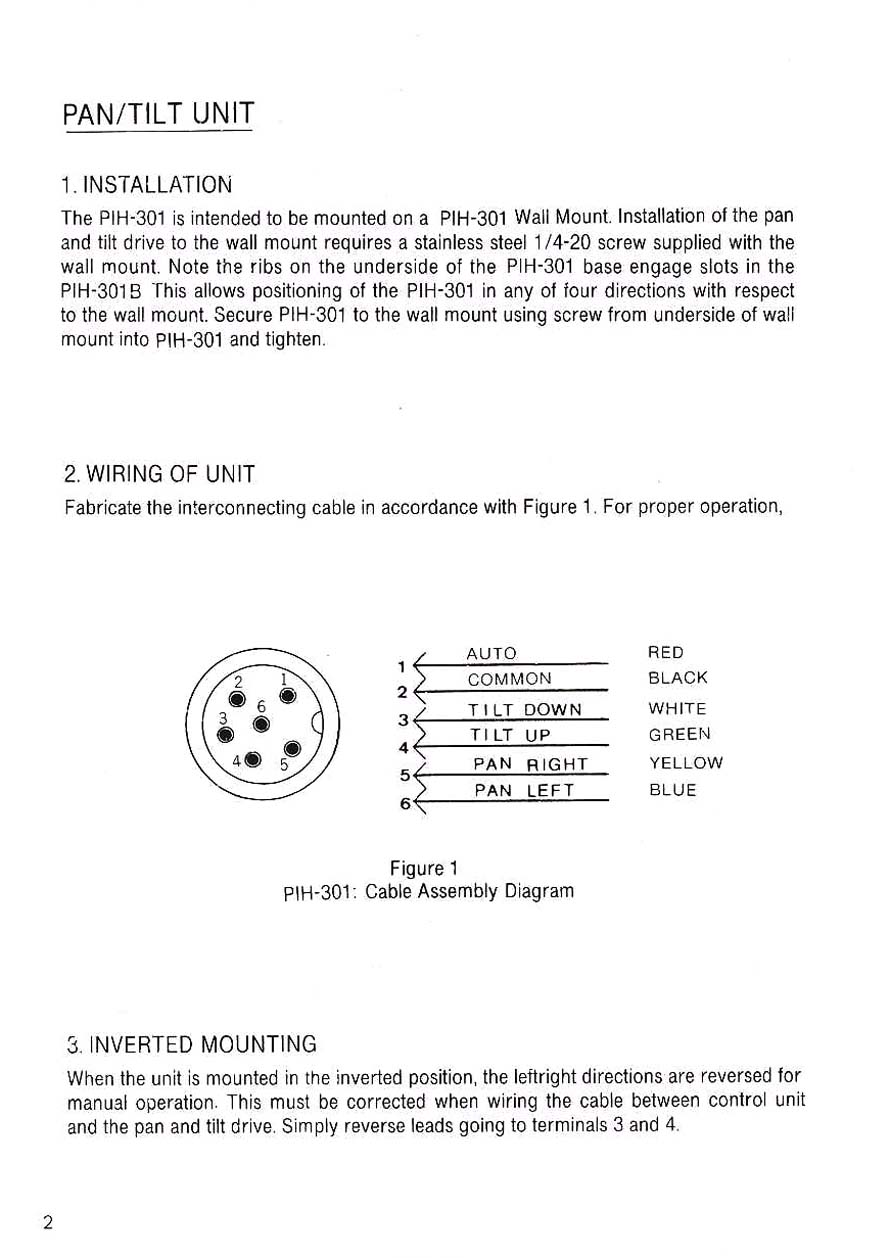
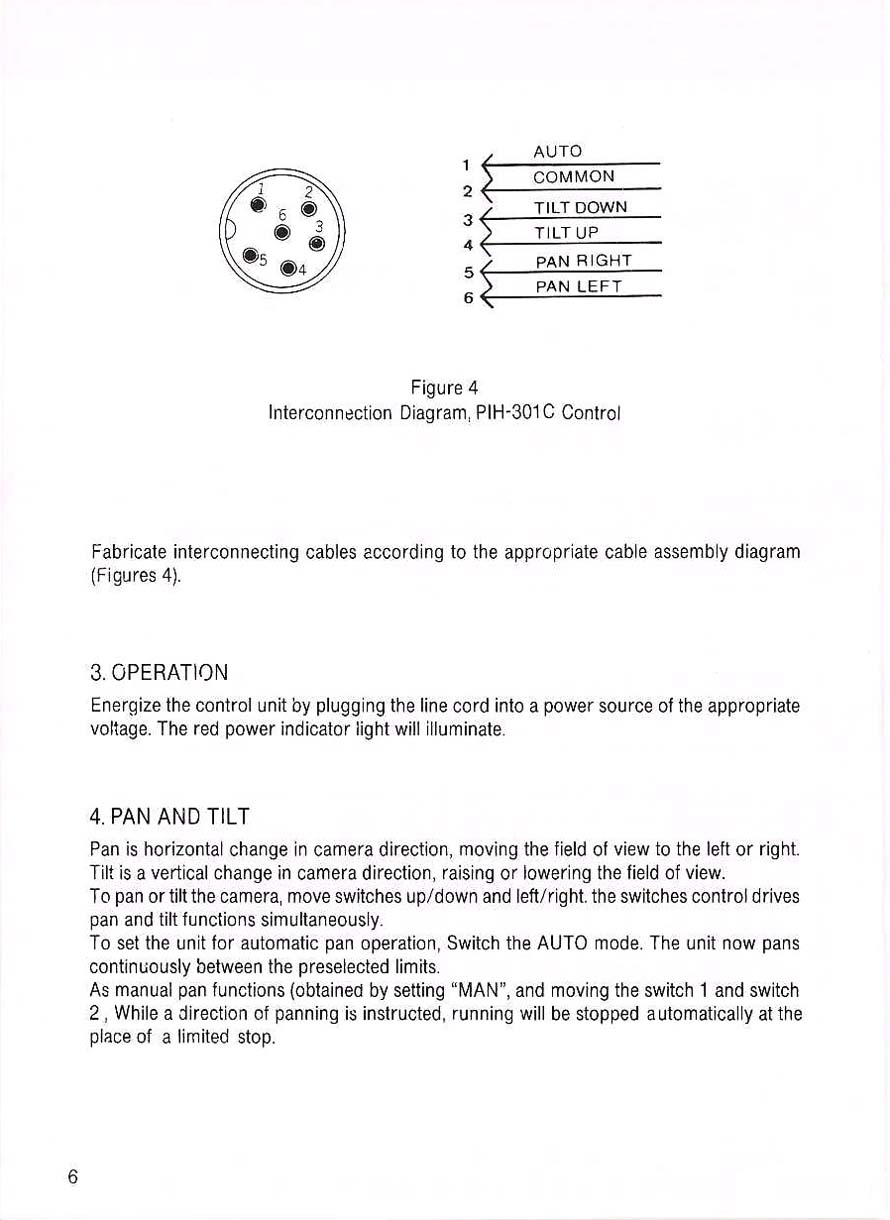
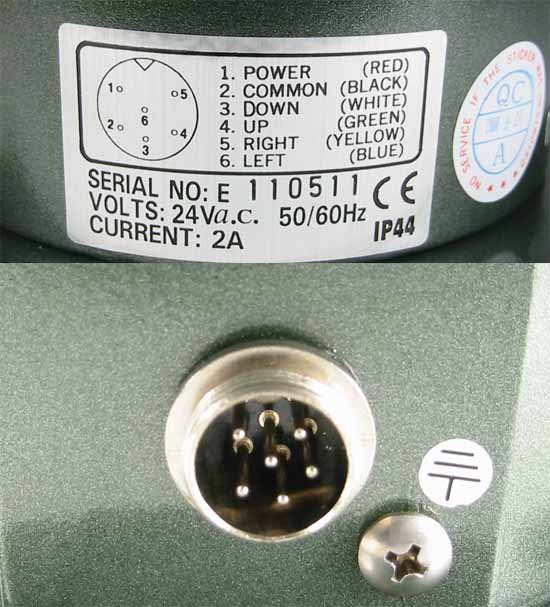
2. WIRING OF UNIT
Fabricate the interconnecting cable in accordance
with Figure 1. For proper operation.
1. Auto-Red
2. Common-Black
3.
Tilt Down-White
4. Tilt Up-Green
5. Pan Right-Yellow
6. Pan Left-Blue
3. INVERTED MOUNTING
When the unit is mounted in the inverted
position, the left right directions are reversed for manual operation. This must
be corrected when wiring the cable between control unit and the pan and tilt drive.
Simply reverse leads going to terminals 3 and 4.
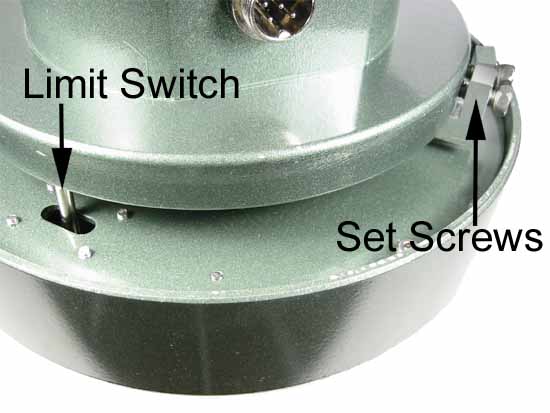
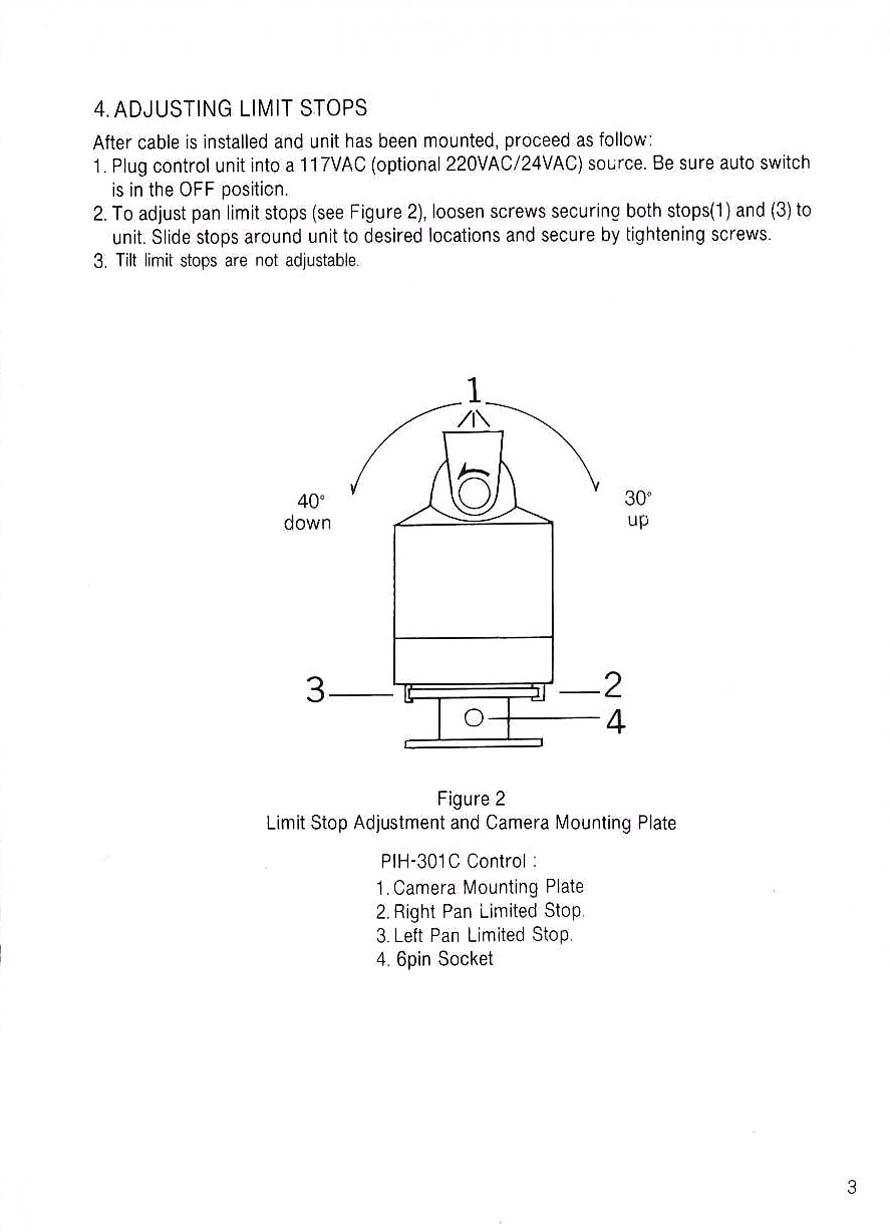
4. ADJUSTING LIMIT
STOPS
After cable is installed and unit has been mounted, proceed as follow:
1. Plug control unit into a 117VAC source. Be sure auto switch is in the OFF position.
2. To Adjust pan limit stops (see Figure 2), loosen screws securing both stops
(1) and (3) to unit. Slide stops around unit to desired locations and secure by
tightening screws.
3. Tilt limit stops are not adjustable.
5.MAINTENANCE
This pan and tilt drive requires no lubrication or maintenance for the life of
the unit. Replacement fuse values are given in the instructions supplied with
the control unit.
6. WIRING OF PAN/TILT
Before connecting pan
and tilt controls to the system, slide the module into the card cage or enclosure
from front to back, guiding the line cord through first. To secure the module
in place, loosen the screw on the retaining bracket located on the rear panel
of the module, in the upper right corner. Slide the bracket up and tighten the
screw. 1. auto, 2. common, 3. tilt down, 4. tilt up, 5 pan right, 6. pan left.
7. OPERATION
Energize the control unit by plugging the line
cord into a power source of the appropriate voltage. The red power indicator light
will illuminate.
8. PAN AND TILT
Pan is horizontal change in
camera direction, moving the field of view to the left or right. Tilt is a vertical
change in camera direction, raising or lowering the field of view. To pan or tilt
the camera, move switches up/down and left/right. The switches control drives
pan and tilt functions simultaneously. To set the unit for automatic pan operation,
Switch the AUTO mode. The unit now pans continuously between the preselected limits.
As manual pan functions (obtained by setting MAN, and moving the switch 1 and
switch 2, while a direction of panning is instructed, running will be stopped
automatically at the place of a limited stop.
|
Disclaimer:
Actual products may vary from photographs shown. We are not responsible for
any unintentional omissions or typographical errors. We reserve the right to make
changes to packages, services, operating procedures, colors, materials, features,
specifications, part numbers and pricing. We may discontinue any product at any
time without prior notice. |